Zapier for Accountants
You may have noticed that everyone has been talking A LOT about Zapier lately, and you’re probably wondering, what is all the buzz about?
Imagine this: you send a new client a Google Form to gather their information. They complete and submit the form and the following tasks occur automatically:
- The client is added as a new Client in Ignition
- A new channel is created in Slack
- A new folder is created in Sharefile, Google Drive or DropBox
- A new card is created in Trello
- A notification is sent to someone in your organization to let them know that the client has completed the form and the tasks above have been completed
Sounds incredible, doesn’t it? You can save countless hours each month using Zapier to automate many of your recurring tasks. Accounting firms are now offering Zapier consulting as part of their firm service offerings and bring the power of self-serve automation to their clients and community.
What is Zapier?
Zapier is a web-based application designed for non-techies that allows you to create automated workflows between other web-based apps that you probably already use, like Gmail, Trello, QuickBooks, Xero and over 1,000 other supported apps. Some exciting recent additions to their platform include awesome accountant-specific apps like Ignition.
How does Zapier work?
A Zap starts with a Trigger, which means that something happens in an app that you’re using, this could be that you receive a new email in Gmail, or create a new invoice in QuickBooks, or an event is added to your Google Calendar. When that Trigger occurs, Zapier sends an Action instruction to another app to do something in another app.
Zapier Example:
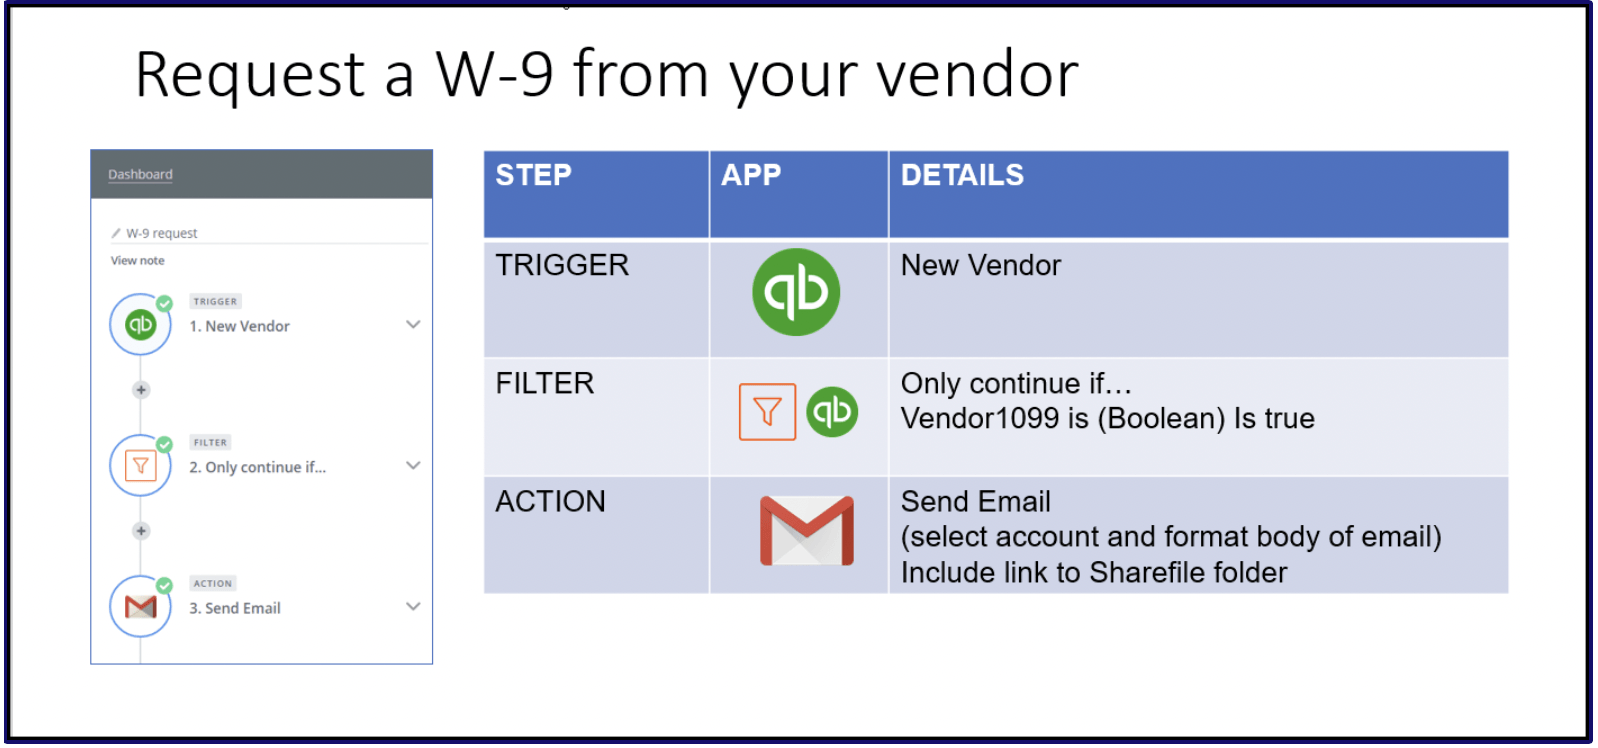
I created a Zap that I use in my own firm that automatically sends a blank Form W-9 to my service vendors via an email when I add the vendor to my QuickBooks Online company. I call this my W-9 collection Zap!
Here’s the way the workflow in Zapier works:

3 Steps to Creating a Zap:
Step 1: Define the Trigger
The first step is to define the Trigger for the Zap. The Trigger in this workflow is that a new Vendor is created in my QuickBooks Online Company. But not all of my vendors should receive a 1099, only the vendors that provide a service to me. This brings me to Step 2.

Step 2: Add a Filter
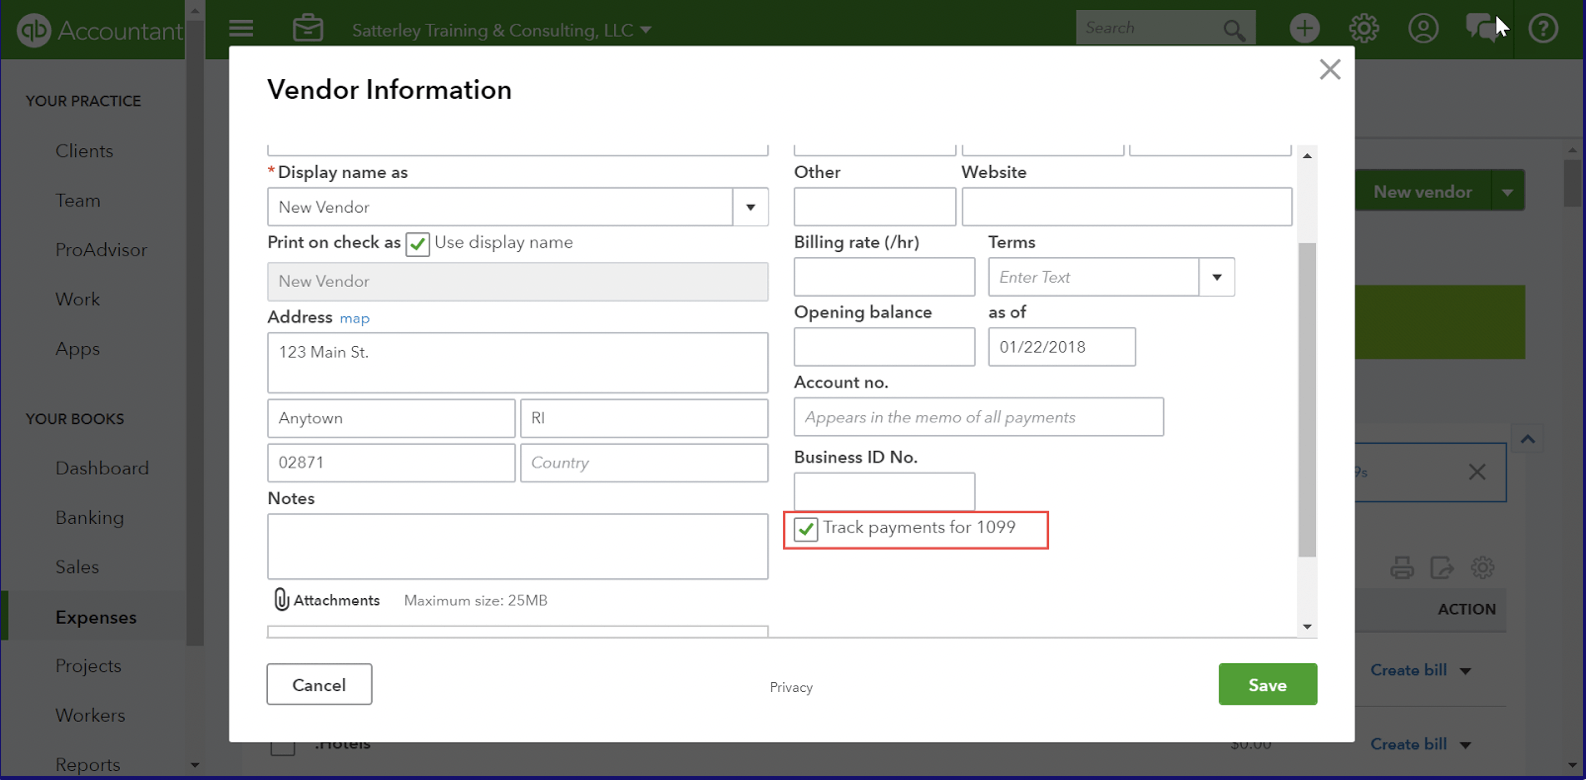
Zapier has built-in apps to help you supercharge your Zaps by filtering for specific data, transforming data from one app to a format that can be read by another app, or completing more complex functions like parsing data from an email. This all sounds very technical but it really isn’t that complicated once you learn the rules and best practices for building Zaps. In my W-9 collection Zap, the filter will be to look to see if the “Track payments for 1099” box is checked when the Vendor is created and only run the Zap if that condition is true. Now that we’ve set up our Trigger and told Zapier exactly what to look for, our next step is to tell Zapier what to do by creating an Action.
Step 3: Add an Action
In this workflow, the Action is to create an email that will be sent to the vendor with a blank W-9 attached to it, along with a link to upload the completed W-9 to a folder in my Sharefile account.

